Showing posts with label Java. Show all posts

Thursday, 7 May 2015

Deploying Java Web Application on AppFog - FREE Cloud Hosting Account


What is AppFog?
If you don’t have an account with AppFog yet, you can create one from here – easiest signup process. You will have an active account in seconds!
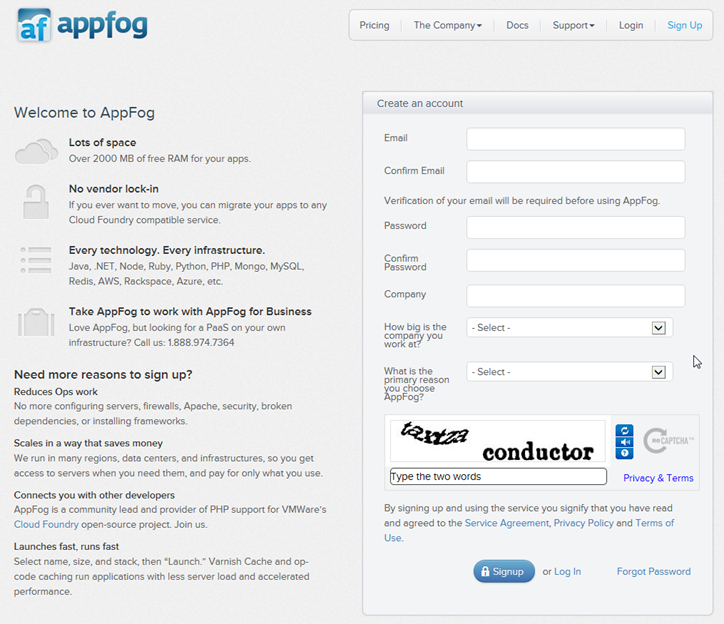
appfog free cloud hosting account signup
Sign into your AppFog account and from top menu click on “Create App” or from bottom click on “New App”
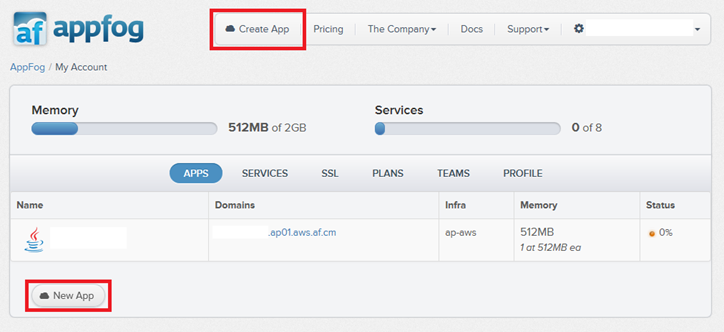
appfog home page
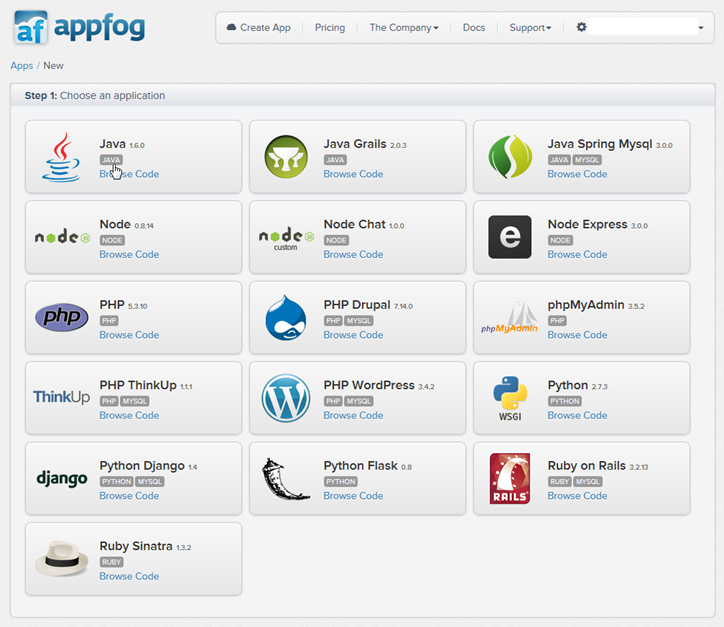
Choose an application type:
appfog - new app - step one - choose an application
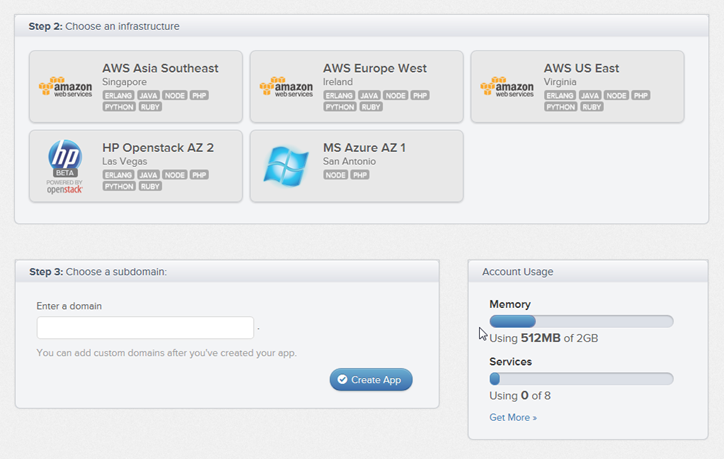
Choose infrastructure type:
appfog - new app - step two - choose an infrastructure
Go to Apps details page and Download Source Code:
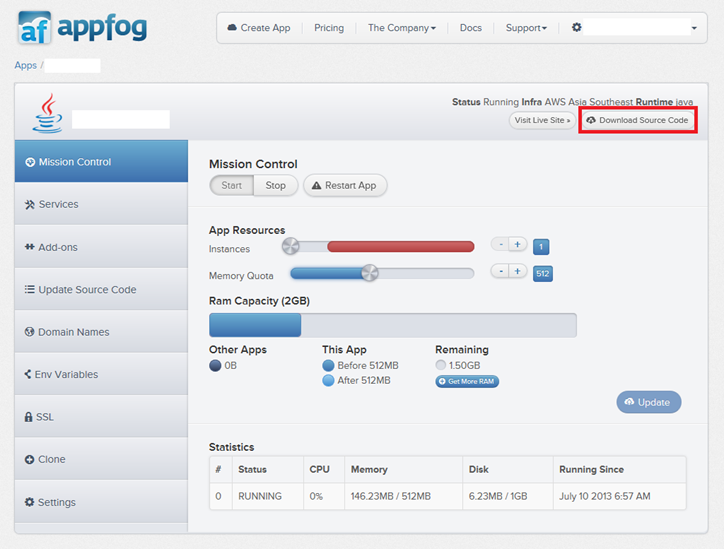
appfog - app - details
Unzip source code at a location on your local machine.
{ If you have not installed Ruby and “af” RubyGem, install it now – How to Install Ruby and “af” RubyGem }
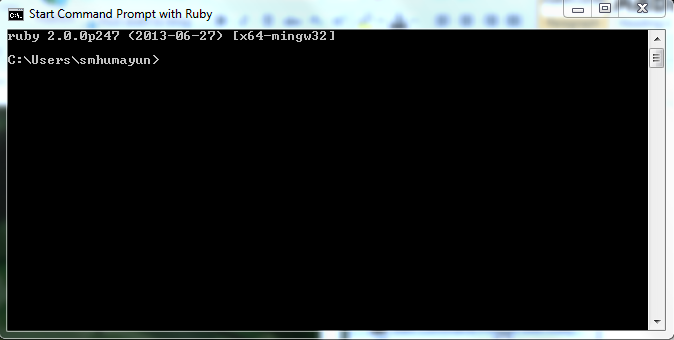
Start Command Prompt with Ruby:
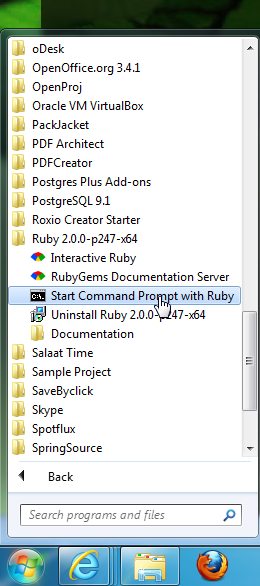
appfog - run af command line tool
appfog - af - command line utility
Run login command : ‘af login’
‘cd’ to your project directory
Run update command to synchronize your remote project with your local one.
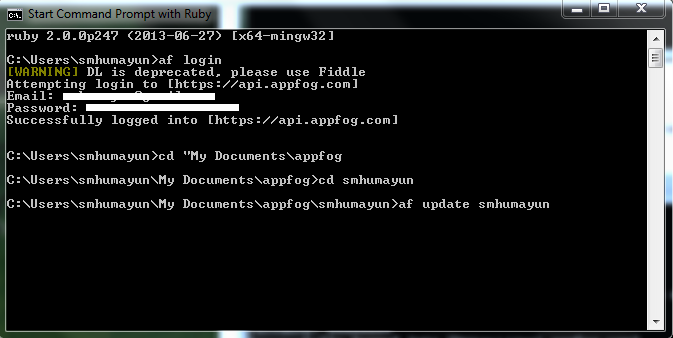
appfog - af - update
All your local files will be packaged and uploaded to your remote cloud space.
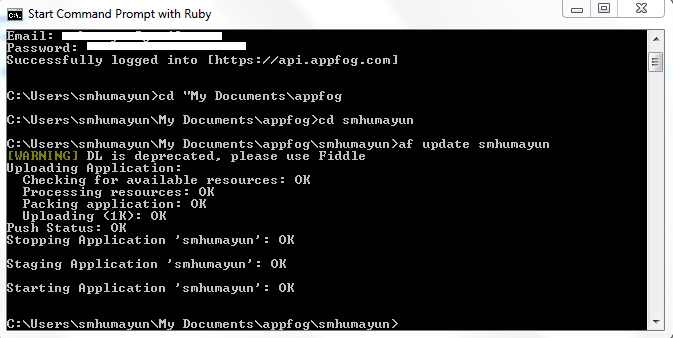
appfog - af - update 2
Go to your AppFog’s App Page and Click on ‘View Live Site’:
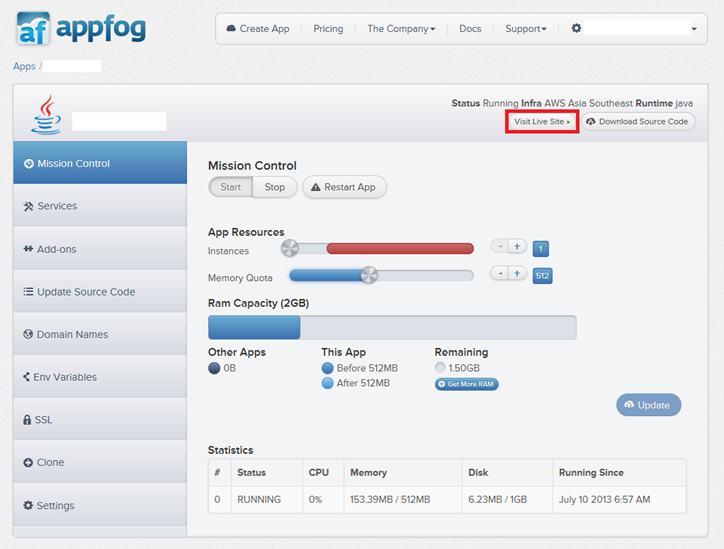
appfog - app - view live site
appfog - live site


Related Tag :
FREE Cloud Hosting Account
Deploying Java Web Application on AppFog
how to Deploying Java Web Application on AppFog
how to deploy java web application on AppFog
how to get free cloud hosting account
Read More »

Integrate Google URL Shortener API in your Java Applications using Scribe-Java and GSon

This post is about a quick and easy integration of Google’s URL Shortener Service/API in your Java Applications using popular APIs like Scribe-Java and Google’s GSon.
The good part about this integration is that you don’t need to do additional steps to register your application with the Service APIs, because in this case, the Google’s URL Shortener Service can be accessed “anonymously”, with out having the need to register the application and performing the authentication and authorization steps.

First Download:
Create a new project in IDE of your choice and add above downloaded JAR files to your project’s build/class path.
GoogleUrlShortenerApiIntegrationUsingScribeExample.java:
/** * Quick and Easy Integration of Google URL Shortener API in your Java Applications using Scribe-Java and GSon * */package com.newlynulled.google.urlshortener;   import com.google.gson.GsonBuilder; import com.google.gson.reflect.TypeToken; import org.scribe.builder.ServiceBuilder; import org.scribe.builder.api.GoogleApi; import org.scribe.model.OAuthRequest; import org.scribe.model.Response; import org.scribe.model.Verb; import org.scribe.oauth.OAuthService;   import java.lang.reflect.Type; import java.util.Map;   /** * This class demonstrate quick and Easy Integration of Google URL Shortener API in your Java Applications * using Scribe-Java and GSon APIs * * User: smhumayun * Date: 7/23/13 * Time: 5:27 PM */public class GoogleUrlShortenerApiIntegrationUsingScribeAndGsonExample {   /** * Main Method * * @param args arguments */ public static void main(String[] args) {   //Instantiating the oAuth Service of Scribe-Java API OAuthService oAuthService = new ServiceBuilder()   //Google Api Provider - Google's URL Shortener API is part of Google Platform APIs .provider(GoogleApi.class)   /* Using "anonymous" as API Key & Secret because Google's URL Shortener service does not necessarily requires App identification and/or User Information Access */ .apiKey("anonymous") .apiSecret("anonymous")   //OAuth 2.0 scope for the Google URL Shortener API .scope("https://www.googleapis.com/auth/urlshortener")   //build it! .build();   //Instantiating oAuth Request of type POST and with Google URL Shortener API End Point URL OAuthRequest oAuthRequest = new OAuthRequest(Verb.POST, "https://www.googleapis.com/urlshortener/v1/url");   //set the content type header to application/json - this is the type of content you are sending as payload oAuthRequest.addHeader("Content-Type", "application/json");   //Preparing JSON payload to send url to Google URL Shortener String json = "{\"longUrl\": \"http://h1b-work-visa-usa.blogspot.com/\"}";   //add xml payload to request oAuthRequest.addPayload(json);   //send the request Response response = oAuthRequest.send();   //print the response from server System.out.println("response.getBody() = " + response.getBody());   //determining the generic type of map Type typeOfMap = new TypeToken<Map<String, String>>() {}.getType(); //desrialize json to map Map<String, String> responseMap = new GsonBuilder().create().fromJson(response.getBody(), typeOfMap);   //print id which is actually the shortened url System.out.println("Shortened URL = " + responseMap.get("id")); }   }
Compile and Run the project. You will notice an output similar to the one below in your IDE’s console:
# Quick and Easy Integration of Google URL Shortener API in your Java Applications using Scribe-Java and GSon   response.getBody() = { "kind": "urlshortener#url", "id": "http://goo.gl/YBpzaA", "longUrl": "http://newlynulled.blogspot.com/" }   Shortened URL = http://goo.gl/YBpzaA
Copy the Shortened URL, open a browser of your choice and paste the Shortened URL into the browser’s Address Bar and press ENTER. You will notice how Google’s URL Shortener Service resolves your Shortened URL to your original (longer) URL.
Read More »

Friday, 1 May 2015

Change Tomcat port numbers in server.xml file

By default, Tomcat is listening on the port number 8080 (for HTTP Connector) and 8009 (for AJP Connector), as shown in the following screenshot of Tomcat’s console when the server is started:


Sometimes, one needs to change these default port numbers because of conflict with other applications or just for convenience, e.g. change HTTP port number from 8080 to 80 in order to type the URL without specifying the number.

It’s very easy to change the port numbers in Tomcat, by doing the following steps:

  • Make sure the server is stopped, or shutdown it if it is running.
  • Open the server.xml file which can be found under TOMCAT_INSTALL_DIR\conf  directory:


  • If we want to change the HTTP port number, search for the following lines: 

<Connector port="8080" protocol="HTTP/1.1"
    connectionTimeout="20000"
              redirectPort="8443" />
  •  Now change the port 8080 to 80: 

<Connector port="80" protocol="HTTP/1.1"
    connectionTimeout="20000"
              redirectPort="8443" />

  •  Save the server.xml file (make sure you have write permission) and restart Tomcat. Now, we can see the HTTP port number gets changed in the console:


Read More »

Change port numbers for Tomcat in Eclipse

By default, Tomcat is configured to listen on the following port numbers:

  • Tomcat admin port: 8005
  • HTTP/1.1: 8080
  • AJP/1.3: 8009

Of course, most of the time we are only interested in the HTTP port number - which is the port we have to type in the URL to access a deployed application, for example:
http://localhost:8080/MyCoolApp
Eclipse allows us to change these port numbers easily with just a click of mouse. In the Servers view, double click on the server name:

That will open a configuration page for Tomcat as follows:

Notice the port numbers are shown in the table on the right. Click to edit, for example:

That will change port number for HTTP from 8080 to 80. Press Ctrl + S to save the change and restart the server. We can spot the change of port number in the Console view:

Now, with port 80 we can remove the port number in the URL:
http://localhost/MyCoolApp
NOTES: Changing the Tomcat’s port numbers in Eclipse does not affect the default Tomcat installation on your computer (outside Eclipse IDE). It is because Eclipse makes a copy of Tomcat configuration in its workspace, by default.
If we notice, there is a node called “Servers” in the Project Explorer/Package Explorer view. Expand this node, we will see:

Under the hood, Eclipse updates the server.xml file when we make change to the port numbers, just like the way we change Tomcat’s port numbers in general.
Read More »

Thursday, 16 April 2015

Fix : java.lang.ClassNotFoundException: com.sun.mail.util.MessageRemovedIOException

Sometimes when we use JavaMail API to send email and got some error like below


Problem :
Use JavaMail API to send Email via GMail smtp server, but hit the following error message :
Caused by: java.lang.ClassNotFoundException: com.sun.mail.util.MessageRemovedIOException
at java.net.URLClassLoader$1.run(URLClassLoader.java:200)
at java.security.AccessController.doPrivileged(Native Method)
at java.net.URLClassLoader.findClass(URLClassLoader.java:188)
at java.lang.ClassLoader.loadClass(ClassLoader.java:307)
at sun.misc.Launcher$AppClassLoader.loadClass(Launcher.java:301)
at java.lang.ClassLoader.loadClass(ClassLoader.java:252)
at java.lang.ClassLoader.loadClassInternal(ClassLoader.java:320)
... 1 more
The javaee.jar library is included.

Solution :
To solve it, you need to include the mail.jar as well, which you can get it from your JavaEE SDK folder or JavaMail API official page.

Again, to send Email via JavaMail API, you need to include both javaee.jar and mail.jar libraries
Read More »